Microsoft replaces its previous live search, MSN search and Yahoo search offerings with Bing search engine in May 2009 with a hope that they can finally conquer the web that is so long has been dominated by Google. Microsoft kept the web search option in windows 10 as default to radically boost the user engagement for Bing. These two companies are engaged in a very tough competition that is why Microsoft want every single user they can get.
The standout features of Microsoft 10 are Cortana digital assistance and web search direct from the windows start menu but the search function, controlled by the Cortana, works in an improbably annoying way by default. Whenever a file or app name is searched in start menu search option and that doesn’t match a system file or app, Cortana access a Bing search engine which comes up with a series of web site addresses by default, rather than checking local hard drive for relevant files.
Initially, Microsoft provided a built-in feature to turn the web search option on or off in Windows 10 search bar in start menu but later on Microsoft removed that inherent option on its anniversary update as it was significantly affecting the Bing online search gains over Google. Most of the people don’t like to search the web from start menu search bar because they already have their browser opened with their favorite search engine for such task. They expect to search in their local hard drive when they write something in start menu Windows search bar.
Luckily, it is still possible to disable the Cortana and Bing search feature from Windows 10 search by just following the below given steps.
Step 1. Disable Cortana in search settings
- Click on the search icon in the bottom left corner
- Click on setting icon on left bar
- Click “Off” next to Cortana/Web searches

Note. If you have the latest updates installed on Windows 10 Home, you have to disable the Cortana with a registry tweak:
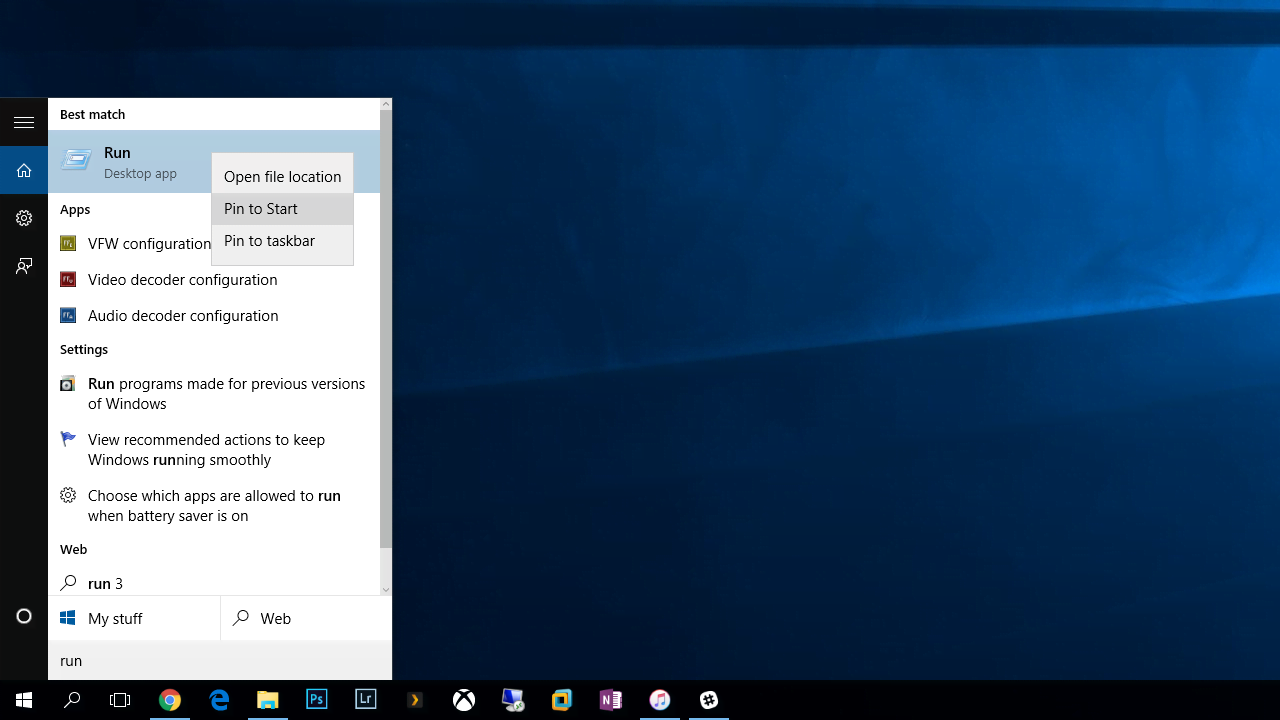
- Press win + R to execute Run dialog box
- Type “regedit” and press Enter key
- Locate HKEY_LOCAL_MACHINE\SOFTWARE\Policies\Microsoft\Windows\Windows Search
- If Windows Search directory does not exist create one by right click Key Heading Windows and select new Key”. Call it “Windows Search” and perform the following procedure
- Right click on Windows Search and select New > Dword (32-bit) value
- Name it “AllowCortana” and double click on it. Set its value to zero 0 to disable Cortana
Step 2. Disabling Web Search in Windows 10 Search
- Press win + R button on keyboard to execute Run dialog box.
- Type msc and press Enter Key to open Group Policy Editor
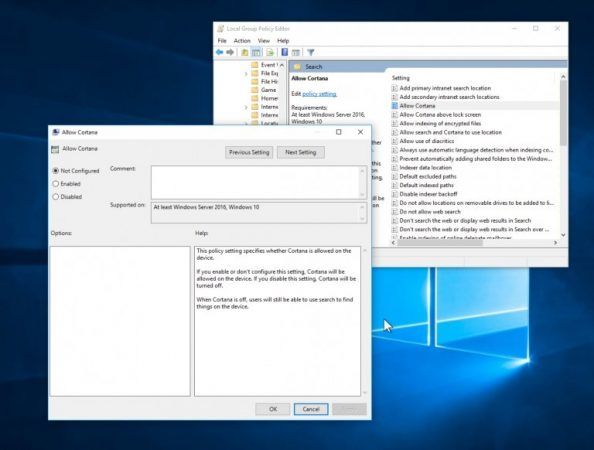
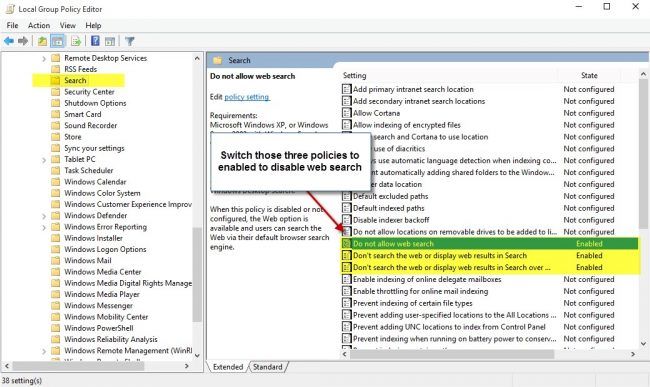
- Now Navigate to Local Computer Policy > Computer Configuration > Administrative Templates > Windows Components > Search
- Now Navigate to “Do not Allow web search” and double click it. Select enabled radio button, press Apply and OK.
- Locate “Don’t search the web or display web results in search” and double click it. Select enabled radio button, press Apply and OK
- Locate “Don’t search the web or display web result in search over metered connections” and double click it. Select enabled, press Apply and Ok
Note. If you are Windows 10 Home user, you will not have the access to “GPedit.msc” Group Policy Editor therefore you have to follow the below procedure to disable the web search feature in Windows 10 search.
- Press “win + R” key to open Run dialog box
- Type “regedit.exe” and press Enter key.
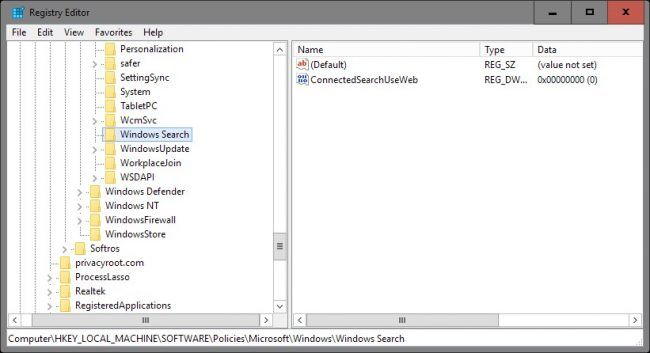
- Now navigate to HKEY_LOCAL_MACHINE\SOFTWARE\Policies\Microsoft\Windows\Windows Search
- If the key is unavailable, create one by right click and select New > Key and name it “Windows Search”
- Locate ConnectedSearchUseWeb and double click on it and set it to zero 0. It will disable the web search in Windows 10
- If you can’t find the above preference, create one yourself by right clicking on Windows Search and selecting New > Dword (32- bit) value. Name it “ConnectedSearchUseWeb” and set its value to zero 0.
Source: G7 Cloud