Every time, buying a new DVD or inserting an old one in your computer to install Windows 8 is definitely not a cool idea. If you are bored in doing this practice time and again, than we have a solution to your this problem. And if you don’t want to download setup from Google, this article is also for you. Read this article till end and you will find real time convenient ways to install windows 8 using your portable USB.
This guide is divided into four parts to make it easy and comprehensible to go with.
PART 1: CREATE WINDOWS 8 ISO
- Install a burning program: There are lots of free burning programs available on the internet. You will be needed one that can create ISO for your Windows 8.
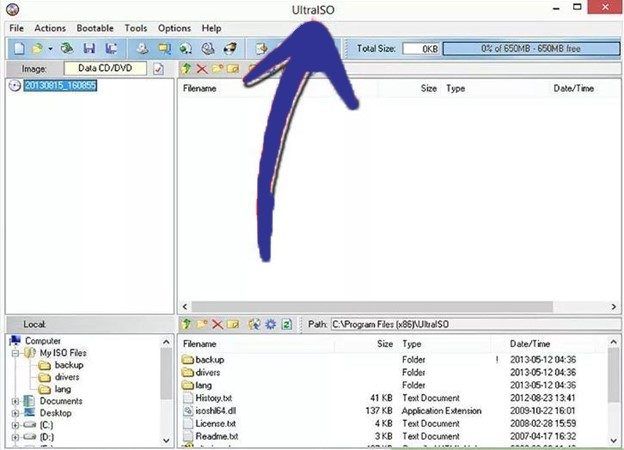
- Insert DVD of Windows 8: After creating a space for ISO, next step you will be doing is to insert your DVD for Windows 8 in burning program. You can see how you would choose your command in this picture.

- Saving ISO file: Till this step, your ISO file will be ready to be saved in your computer. Save it and remember its location in your computer as well. This may take long time depending upon the speed of computer.

PART 2: CREATE BOOTABLE DRIVE
- Download windows 7 USB download tool: This is freely available on internet, download it and use it for ISO Windows 8. It supports all versions of windows.<img class=”aligncenter wp-image-8555 size-large” src=”https://www.64bitz.com/wp-content/uploads/2016/12/install-windows-from-usb-4-1-650×326.png” sizes=”(max-width: 650px) 100vw, 650px” srcset=”https://www.64bitz.com/wp-content/uploads/2016/12/install-windows-from-usb-4-1-650×326.png 650w, https://www.64bitz.com/wp-content/uploads/2016/12/install-windows-from-usb-4-1-300×150.png 300w, https://www redirected here.64bitz.com/wp-content/uploads/2016/12/install-windows-from-usb-4-1.png 694w” width=”650″ height=”326″ />
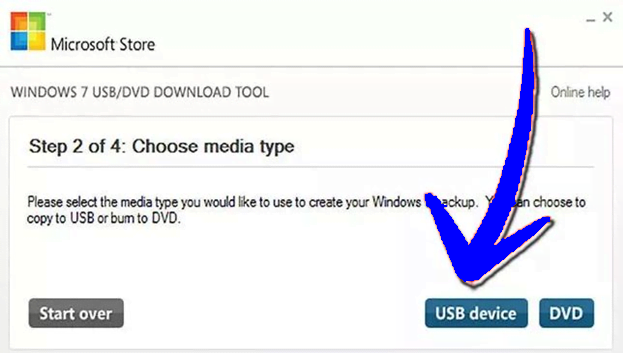
- Source file selection: In this step, brows and select the source file (ISO) that was created. Once selected, click next button.
- USB device selection: Download tool will ask to create either DVD or USB file, click USB device.
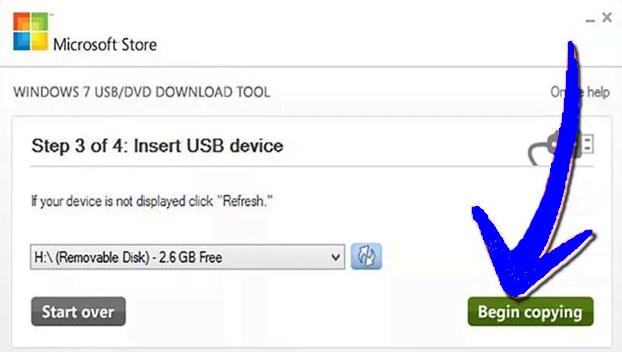
- Selecting USB drive from the attached devices: 4GB space will be required to perform this action. Make sure that USB is connected properly and after selection, click Begin Copying.
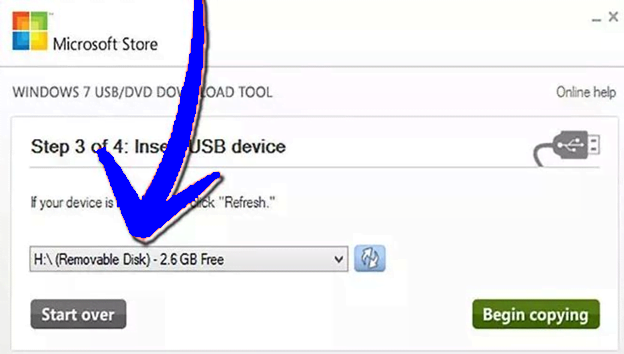
- Wait for the program: Program will take sometimes to copy the ISO file. Little wait for it.
PART 3: OPTIMIZING COMPUTER SETTINGS TO BOOT FROM USB
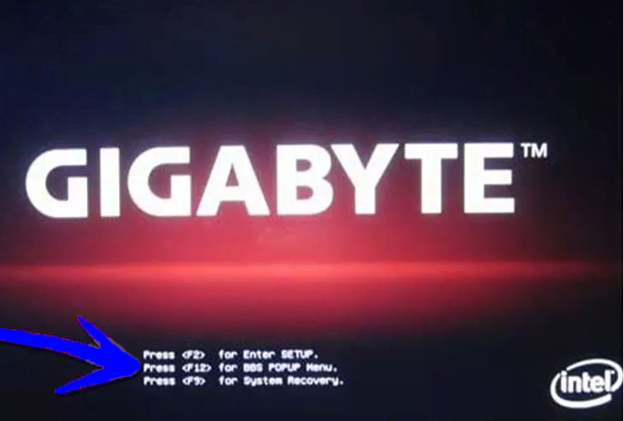
- Opening the BIOS: Booting computer from USB, you will need to set BIOS boot in the USB first before setting it in hard drive of the computer. For this purpose, you will be needed to reset the computer and entering into the setup by pressing displayed keys. These keys can be F2, F10 or Del.
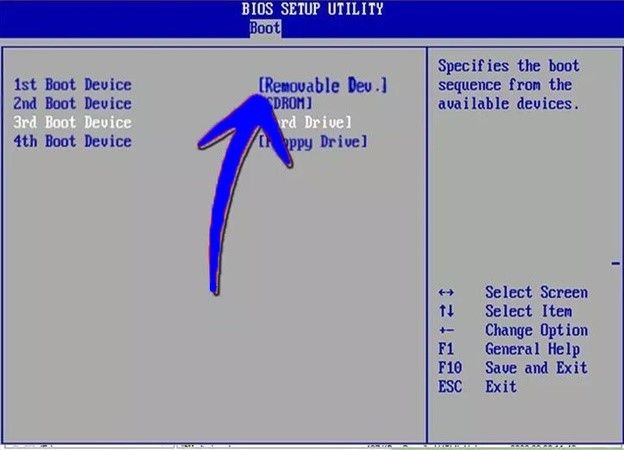
- Navigate the Boot menu in BIOS adjusted: In dropdown options, change the first Boot Device to the USB drive. If USB drive is properly inserted, it will be shown
- There as either ‘Removable Device’ or any other name.
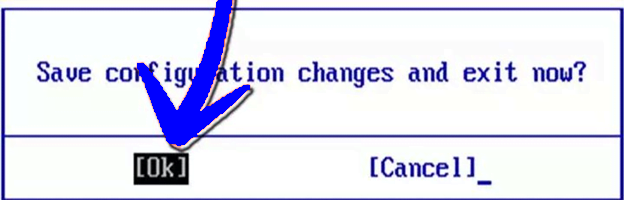
- Save the changes: In this step, you will be only needed to save the changes made. If everything is done correctly, Windows 8 will start to load after disappearance of logo.
PART 4: INSTALLATION OF WINDOWS 8
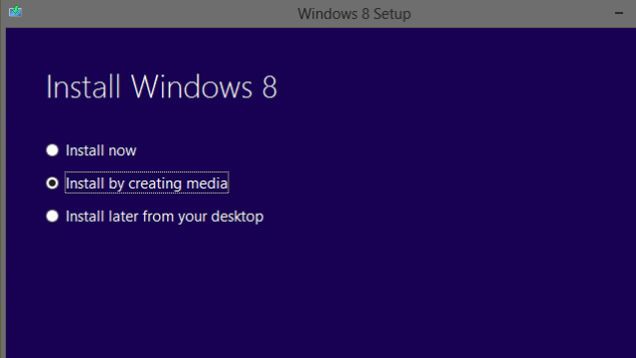
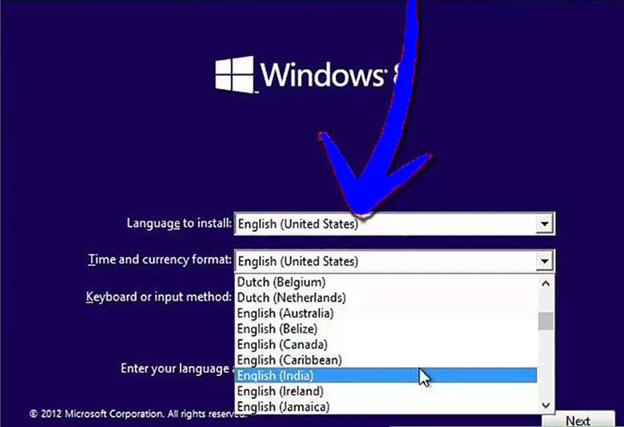
- Select the language: When installations will be begun, it will ask you to select the language you want to use. After doing this, click next.
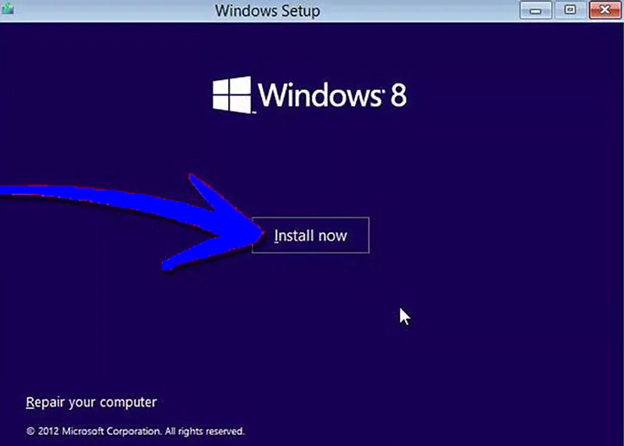
- Click on Install Now: In this window screen, you will be needed to click on Install Now’s option.
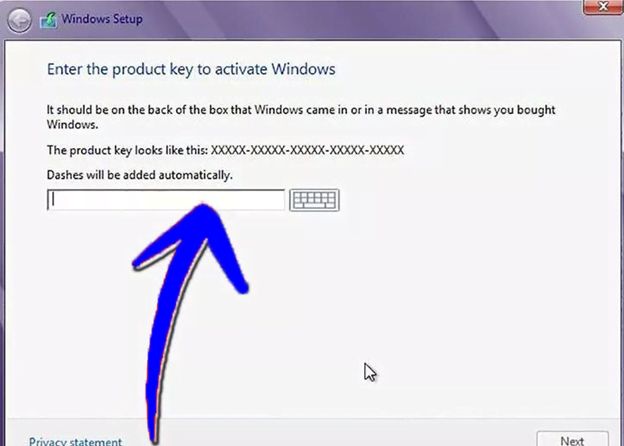
- Enter the Key: This is called the product key that come along with purchased Windows copy. These are 25 characters and you will not need to enter the dashes while entering this key to the computer. This is a must step that should be followed prior installing the Windows.
- License agreement: In this step, you will need to check a box that will confirm that you are agreeing with license term and conditioned mentioned. This is also a must step and windows installation will only proceed once this step will be executed.

- Picking Custom Install: This step will give you two options, either you want a custom installation of Windows 8 or you want an upgrade. Custom Install is highly recommended that will allow full installation of Windows 8. Upgrade can cause problems on long term basis.

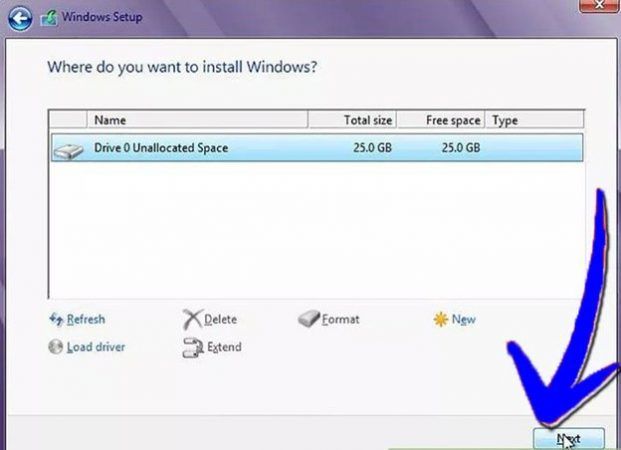
- Delete partition: In this step, a news Window will open that will ask you where you want to install Windows. For a clean installation, you will have to delete old Window’s partition. You will be needed to click on drive options, that will make you able to delete the old partitions and help you start with new clean slate.
If you are installing an operating system for the first time, there will be no partitions to delete.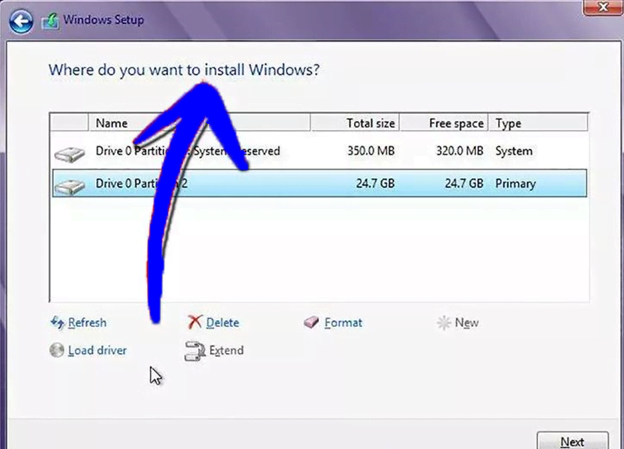
At the end of all this actions, you will be needed to confirm the deletion commands.
- Select an unallocated space: There will be no need to create space for new partition before you start installing Windows 8. This is automatically done by the Windows. Click next in this step.
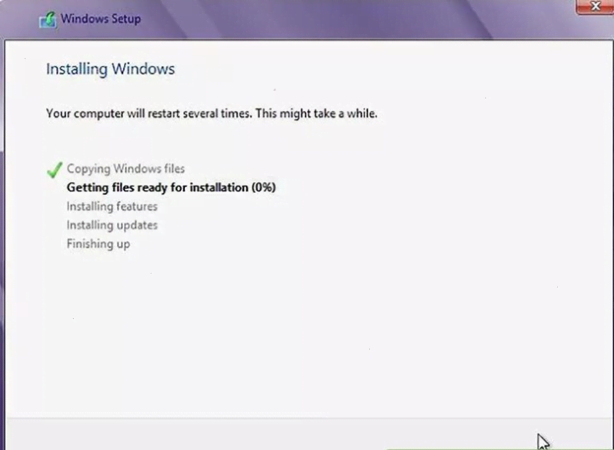
- Windows will start installing files: In this step, you computer screen will show the percentage of installing files by Windows 8. This percentage will increase gradually and may take up to 30 minutes time to complete the process. You will need to wait during the process. After done installation of files, computer will restart automatically.
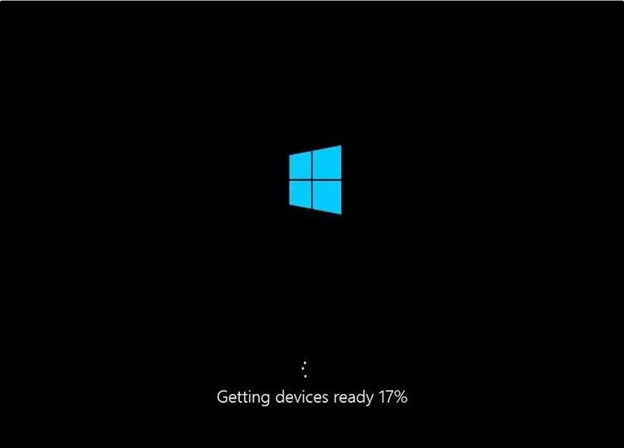
- Gathering of information by Windows: After restarting the computer, logo of Windows 8 will appear with the text saying ‘getting devices ready’ along with percentage. After completion of this process, Window will automatically restart again.
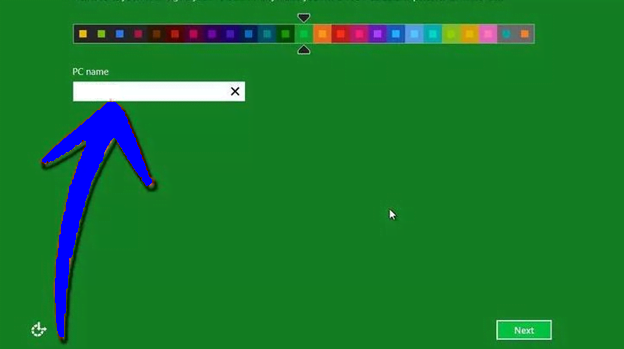
- Personalize the windows: A personalization Window will appear after finishing the rebooting. You will be asked to pick up a color pattern for your Windows. However, you can change it anytime from Windows settings.
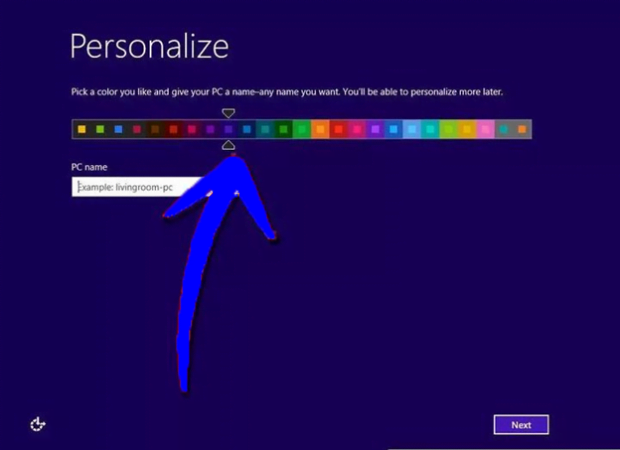
- Enter the computer’s name: Enter a name for your computer and click next.
- Choose your settings: A Window will appear asking for the settings of your choice. You will be needed to optimize the settings. Most common option is ‘Express Settings’ which will make enable the updates that will appear during the usage of Windows in future.

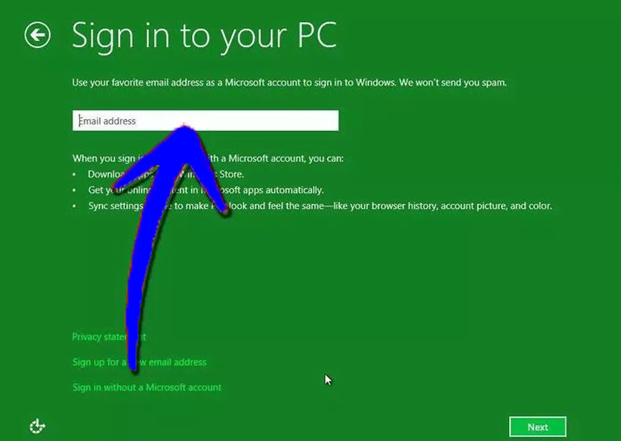
- Create the account: In this step, you will be asked to create an account so that you can log in to windows. Microsoft usually recommend a Microsoft account for this purpose however, you can enter any valid email address for the same purpose as well. This account will enable you to make purchases from Microsoft stores in future. You can also sign up for new email address if you don’t have one.
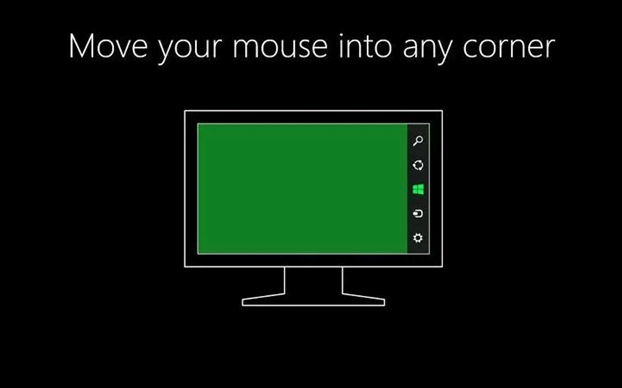
- Watch the tutorial: Once you are done selecting all of your customized settings, Windows will take a final round and will display several screens that will explain you how you will use Windows. On the finishing of this tutorial, you are ready to go with Windows8!
Congratulations, you’ve successfully installed Windows 8 from a USB storage device!
Source: G7 Cloud
Prefer a video how to guide? see below.


